
Simplified: Serverless backend, Auth, Data Persistence and type safety
Building backend services for my app as a frontend developer

A few words before we start.
I was overwhelmed with the positive response I received on Linkedin and Substack for the beta version of this app.
I truly appreciate every single one of you who liked and commented.
It’s wild to think how far we’ve come from the initial sketches of this app just a few months ago!
You can see the new features at this address:
Since the project is fully open source, you can also grab the code here: https://github.com/railaru/gile
Here’s a video of some of the new features:
New features
1: Register and login functionality + Google Social login
Here’s how I built it:
Step 1. Choose an authorization provider
When it comes to rolling auth, there are two main camps developers fall into:
a) Developers who say that you should self-host your authorization infrastructure.
b) Developers who use third-party solutions.
Since I’m working on this project solo, I’m going with the second option as I want to spend more time developing business logic.
The solution I picked for this project is Clerk. I’ve used Auth0 in the past, and I can say that Clerk has far better developer experience.
Step 2. Setup a middleware
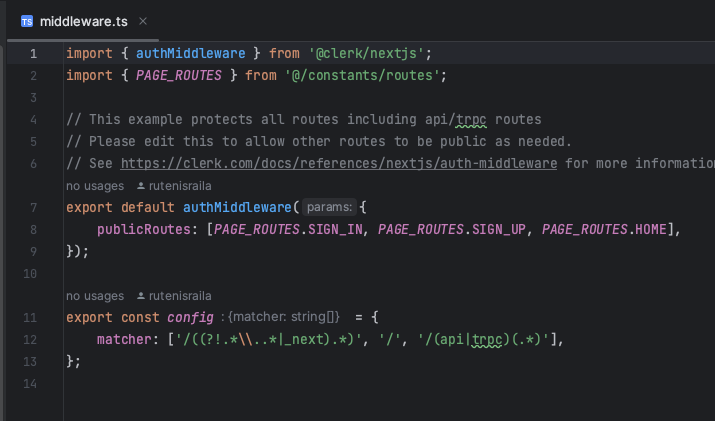
I’m using Next.js for this project, which has a convenient way to handle middleware.
What is a middleware? It’s simply code that runs whenever a client requests something from your server.
So, for example, when someone goes to www.gile.to and tries to access the /dashboard route, they will be redirected to the homepage as that route requires user authorization.
Once the user has registered and logged in, the middleware will allow to access the private routes.
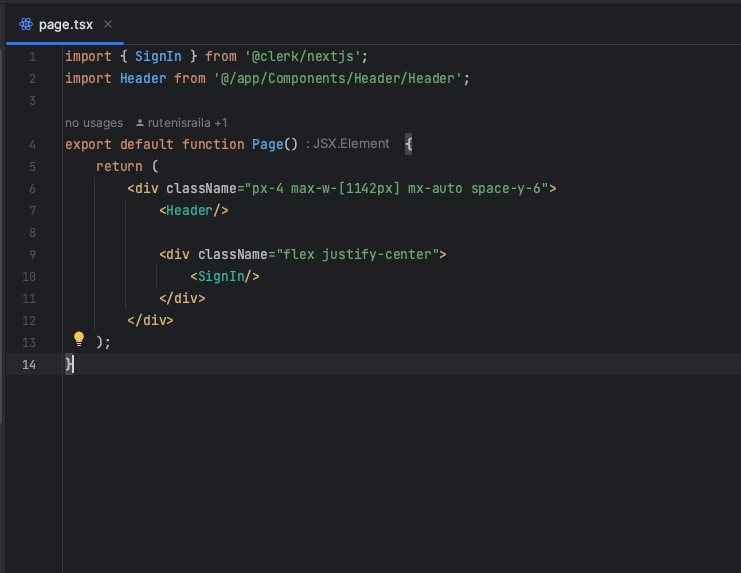
Step 3. Setup router
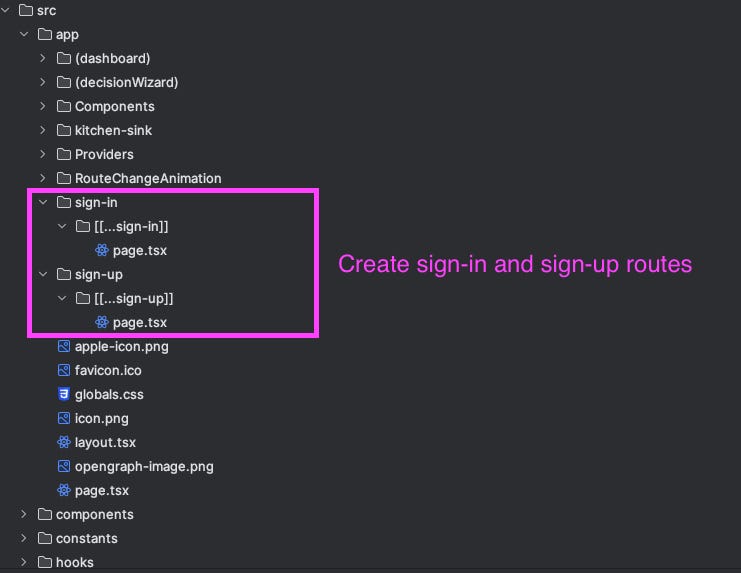
Then, I set up the pages where the user can sign in and sign up. I’ve used the Next.js App Router in this example.
If you would like to explore how Next.js App Router works and how it differs from the Pages Router, I wrote an in-depth comparison here.
💡 The
[[…sign-in]]syntax is important because it allows the router to catch all the registration callbacks generated by Clerk.
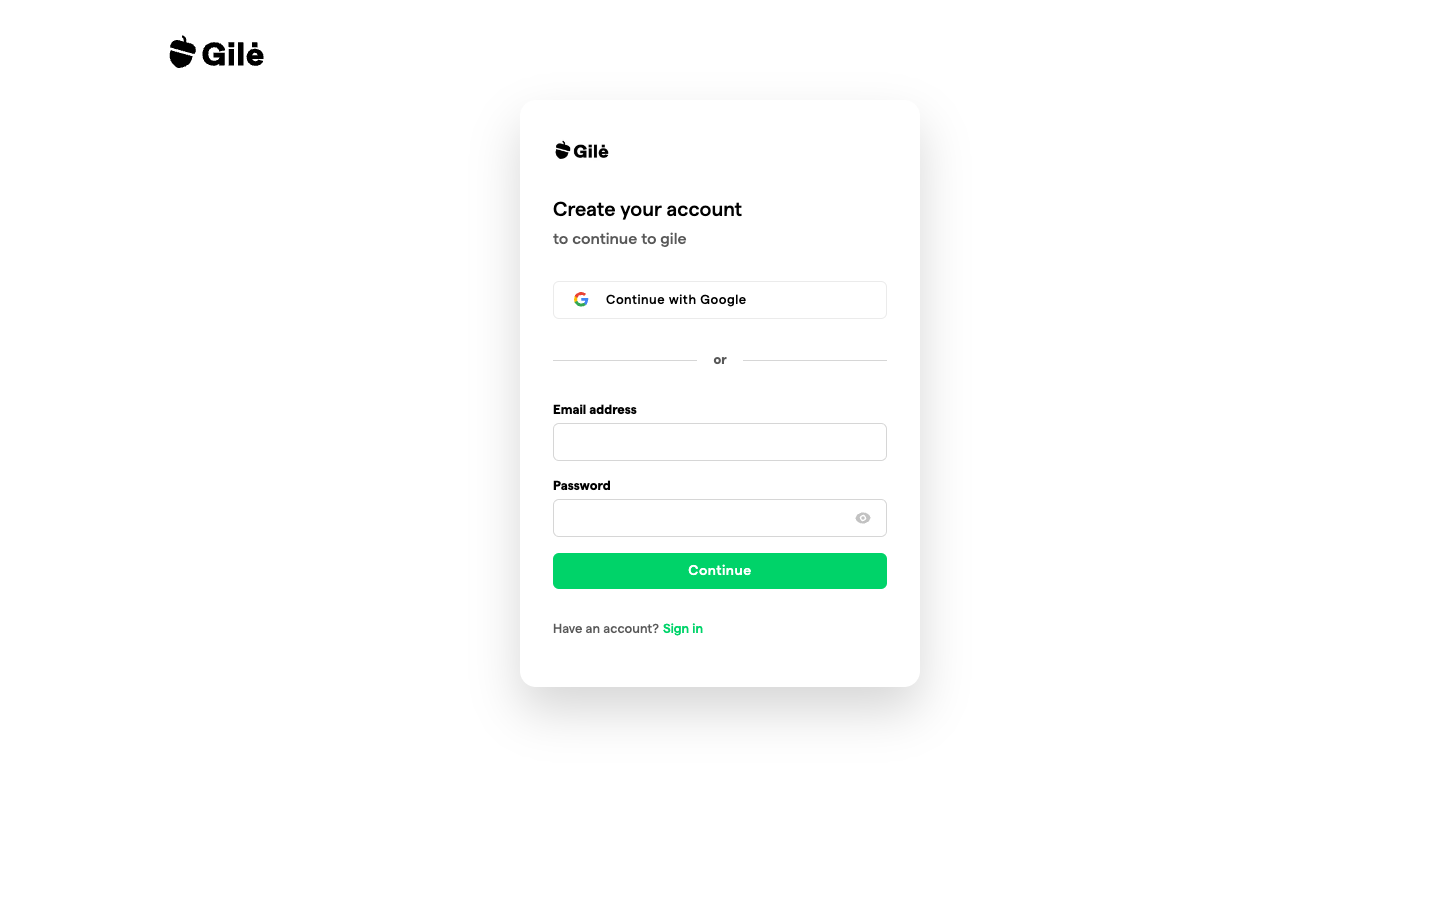
Step 4. Setup the Clerk forms
Clerk forms come with validation pre-built. There is a way to build your validation, too, if you choose to.
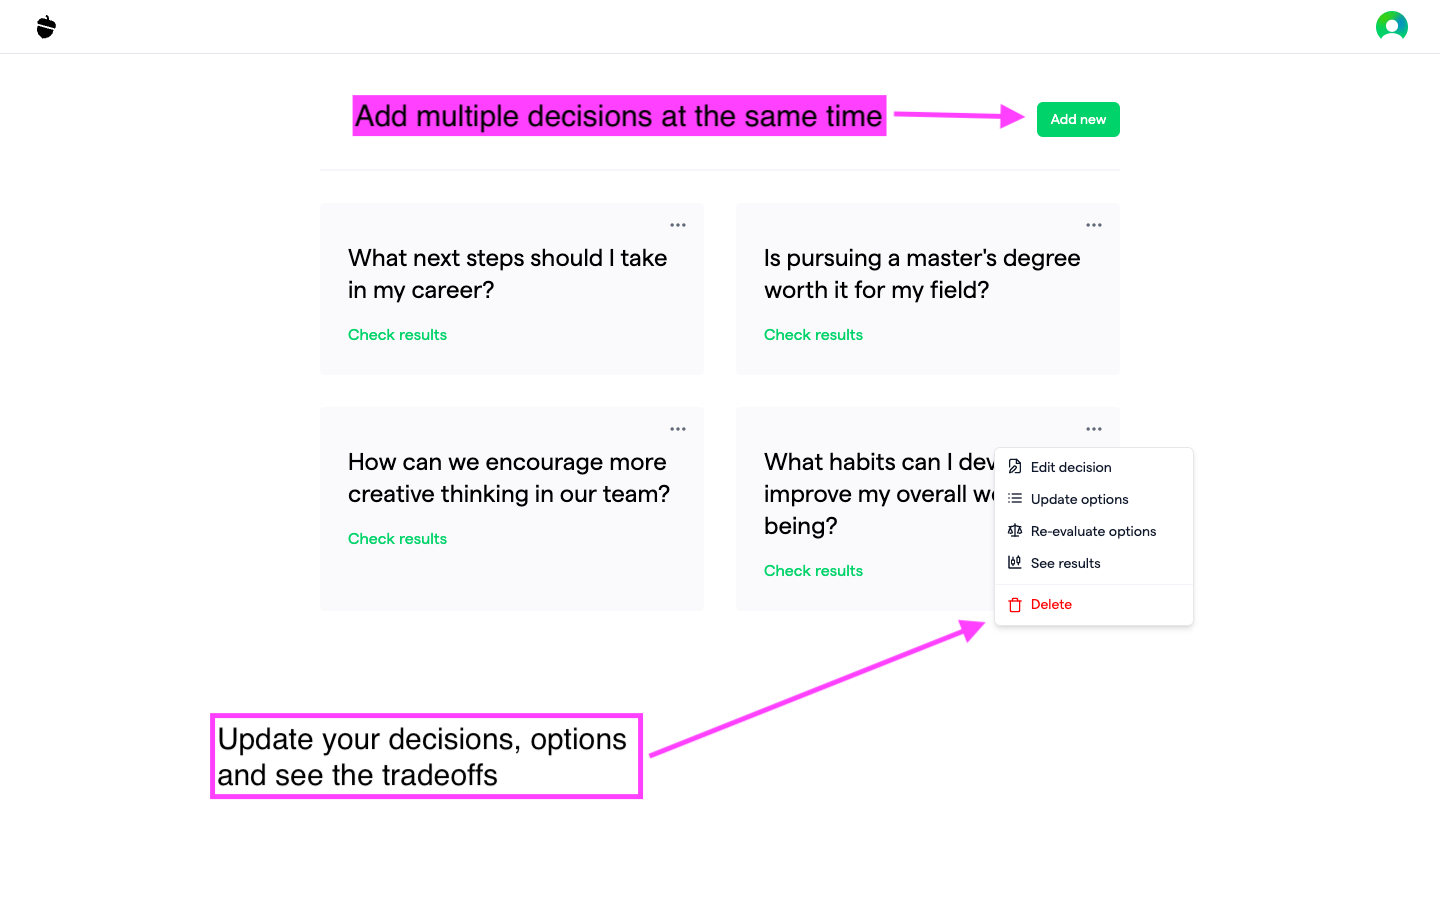
2: Store your decisions in a database
In the previous version of Gile, there was no way to have more than one decision at a time. Now, you can create as many as you want.
They’re only accessible to the user you’ve created. If you create several users, you will only see the decisions created for that user.
Here’s how I built it:
Step 1. Install and set up Convex
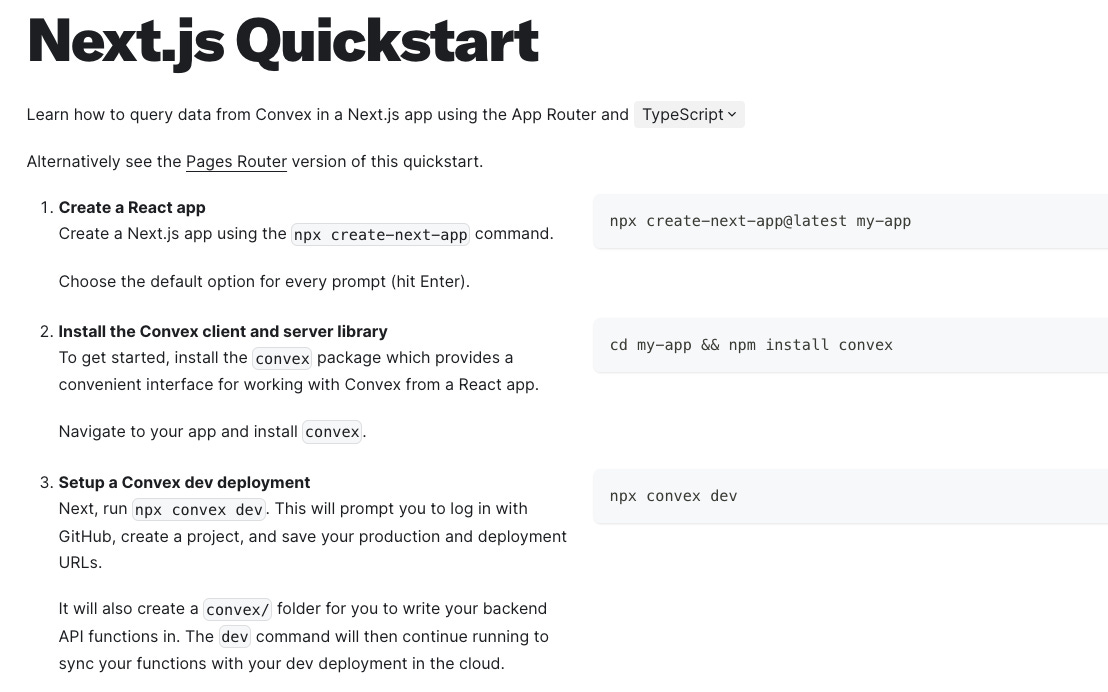
Here’s the complete guide in written form: https://docs.convex.dev/quickstart/nextjs.
If you prefer a video format for tutorials, here’s the one I recommend:
Step 2. Setup your database schema
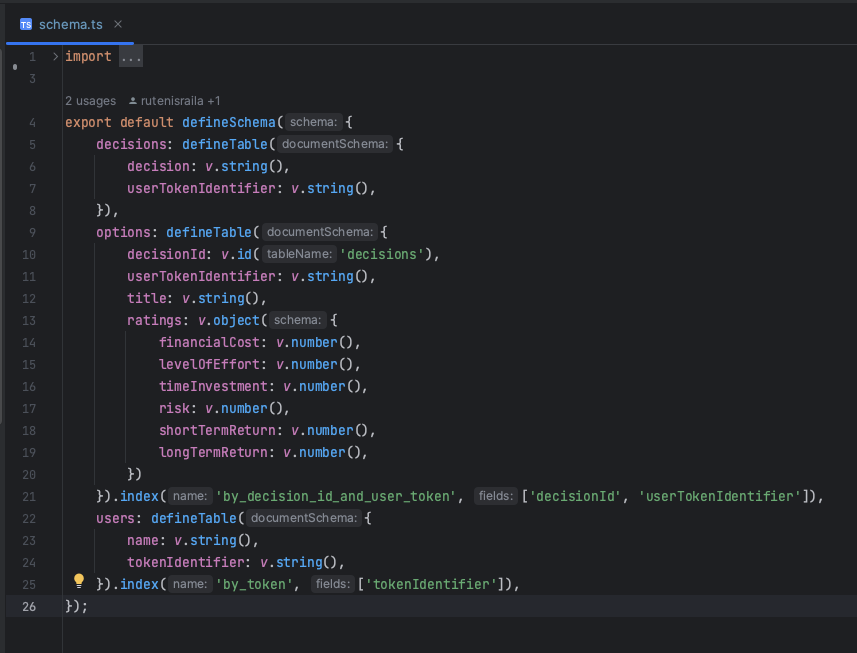
If you were following these series, you probably noticed that I used Zustand for global client state management.
You can see the same datatypes represented in this database schema. If you know TypeScript, Convex allows you to transfer all of this knowledge to build robust and scalable backend code.
💡 The
.index(…)syntax makes it easy to fetch data from the database. I want the decisions to be bind to a certain user and then represent it in the UI. This index makes it possible without executing multiple queries to the database.
Step 3. Create serverless functions.
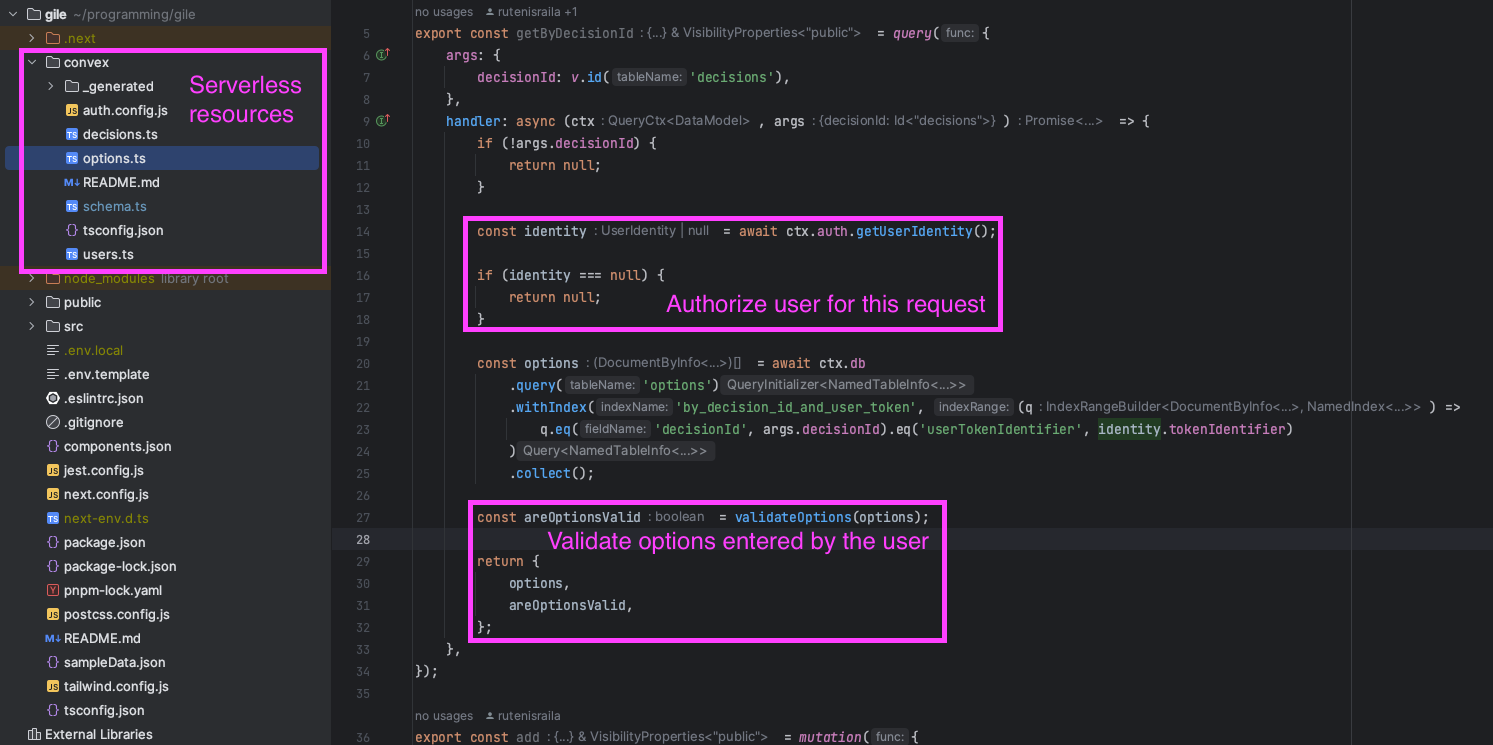
Convex gives you, as a developer, cloud primitives like mutation and query, which work similarly to GET, POST, PUT, PATCH, and DELETE requests in HTTP.
If you’re familiar with tools like React Query or RTK Query, you’ll feel right at home, as this feels very similar to writing frontend code. The difference is that your data is persisted to a highly available and scalable backend.
Step 4. Setup custom React Hooks
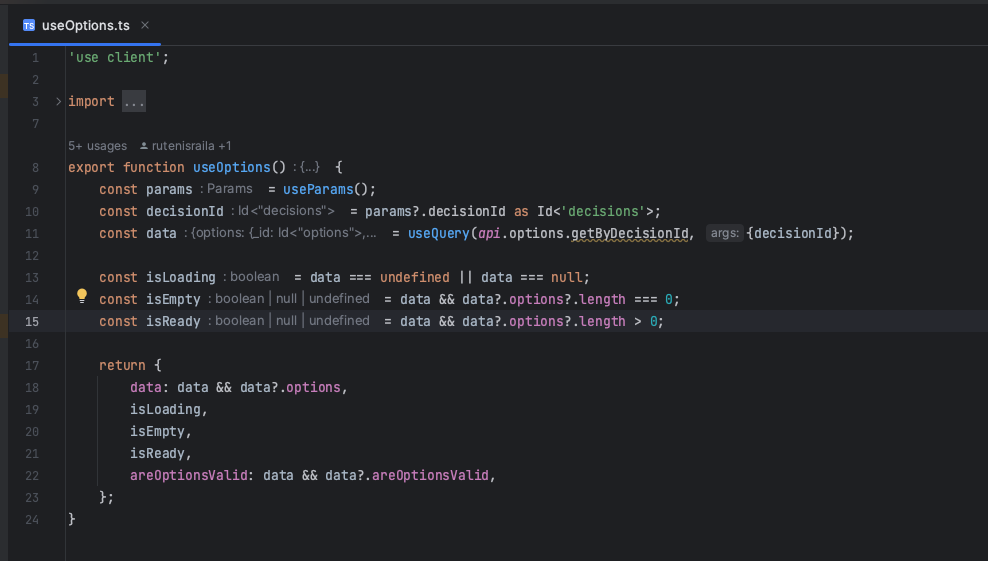
I find it helpful to abstract the code used in a codebase often into custom React hooks.
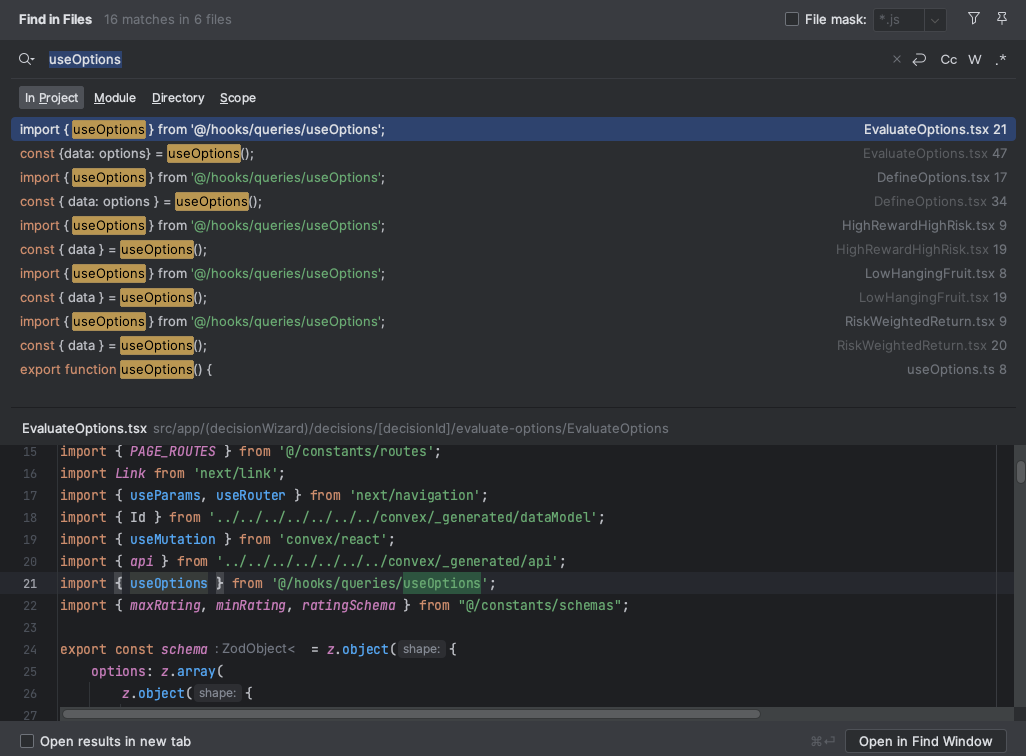
When searching for this hook in the codebase, I can already see it indexed in many places, even with this app being as small. Imagine all the code duplication that could’ve happened without this simple hook 😅.
It’s important to note that convex will automatically cache and dedupe requests, so even if you add multiple instances of the same hook on a page, only one submission will be made.
💡React hooks are very similar to dependancy injection pattern often used in backend frameworks.
Step 5. Use the custom hooks in the UI
The last step is to connect the hooks to the React components we made in the previous issues of this newsletter.
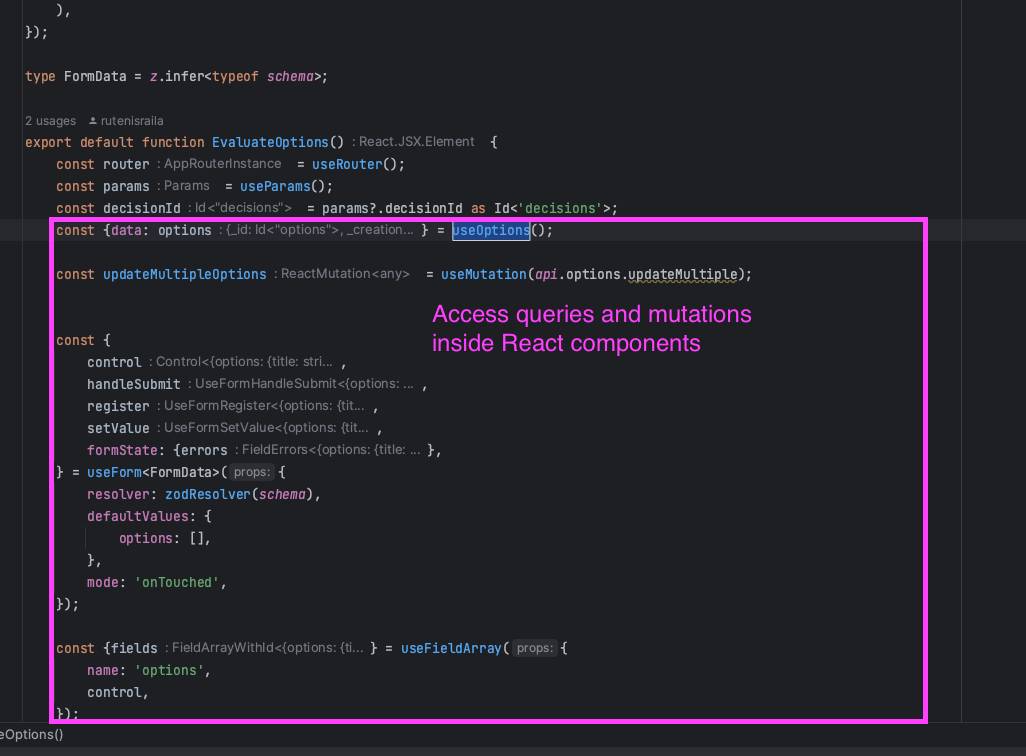
What’s exciting about Convex is that it provides a complete end-to-end type safety from your database to your React components. This lets you catch bugs and edge cases before deploying your code to production.
Final thoughts
I spent years mystifying back-end development. I now realise it’s not nearly as complicated as I thought.
If you can write well-structured front-end code, you can 100% write back-end code too.
I catch myself thinking of the different ideas I could build using the new knowledge I’ve gathered over the past few weeks.
I’m also thinking of database structures that could support them. That’s coming from a guy who moved to web development from visuals and web design 😅.
This makes me think of how many other things I’ve mystified that are actually not as complex as they might seem.
Leverage cloud-based SaaS tools to build your own product.
After I finish this project, I want to go out and build more complex apps. I’m coding them alone, so it’s nice to outsource infrastructure, authorization and backend to managed services.
While I'm okay with making the tradeoffs for using 3rd party services, I recognize some might prefer to fully own their infrastructure and code for their apps.
If that’s you, I recommend Epic Stack by Kent C. Dodds https://www.epicweb.dev/epic-stack
Convex gave me an edge in learning backend because I’m already used to thinking in terms of queries and mutations after years of using React Query.
Find the thing you’re already using and maximize it.
Sometimes, it’s good to build confidence by delivering projects before delving into details too deeply.
If you’re a frontend dev looking to get into full-stack development, learning all the details about the backend might be overwhelming.
Start small through real-world examples and work your way back to lower-level concepts as needed.
Otherwise, you risk getting stuck in tutorial hell and losing motivation.
What’s next?
I still need to fight the final boss for this app.
AI.

Does the app need it? No.
Do I want to learn it? Yes.
Will I share what I learn? Yes!
Also, it would be nice if AI could suggest options one could take when making a decision in the app.
LFG!
As mentioned, this app is fully open-source. Feel free to grab the code here: https://github.com/railaru/gile
👋 Thanks for reading! See you next time!
If you haven’t already, subscribe for future articles.
Great tip!
Now I know what Jordan meant when he referred me to you.
Awesome article as always, Rūtenis. Loved the curated code snippets, exposure to various tools, and clean code examples.
It's funny because while I was reading it was thinking about how AI could be a game changer in the app, only to read the ending. Looking forward to that one!